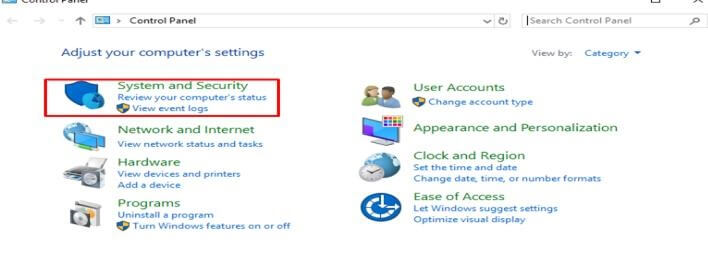
We have to follow these steps to enable specific ports on the Windows firewall -
1. Open the Control Panel and click on "System and Security"
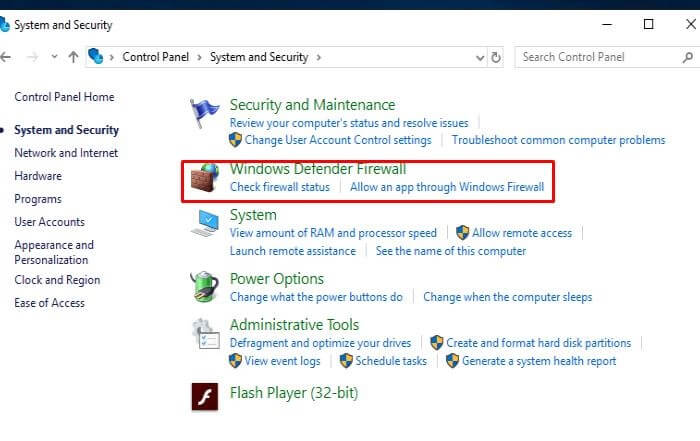
2. Now, click on "Windows Defender Firewall" .
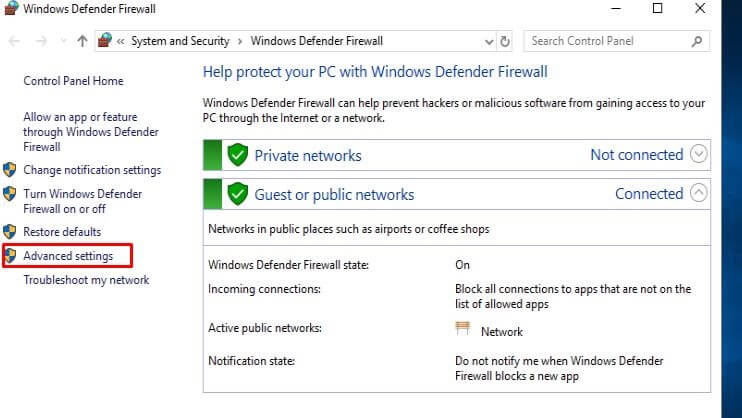
3. In the Windows Defender Firewall window click and open "Advance Settings".
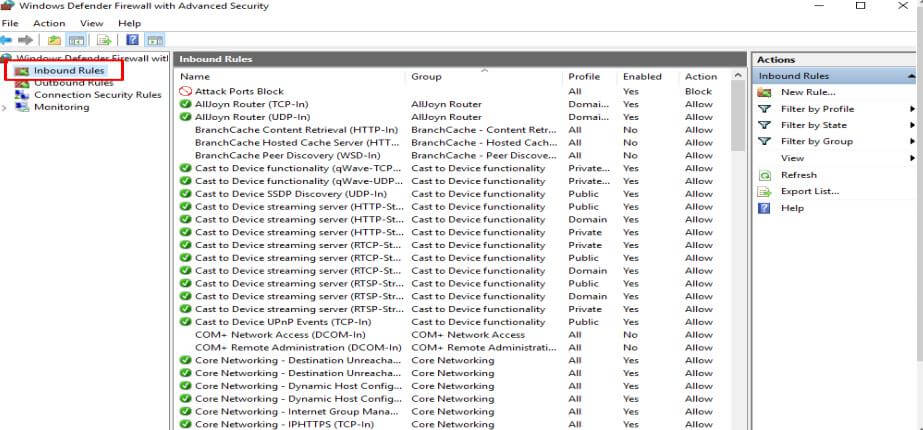
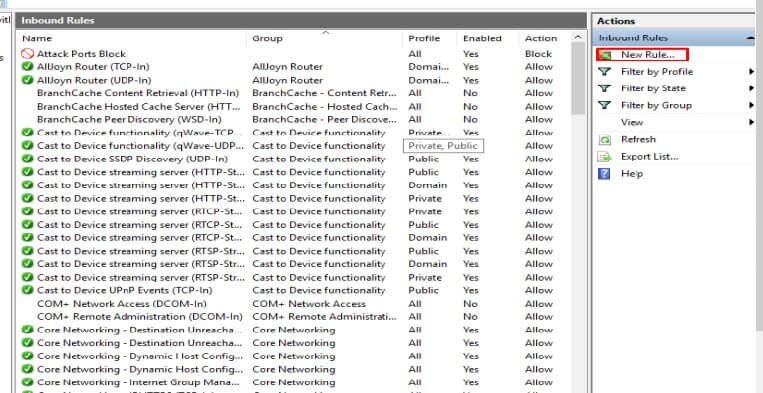
4. In the advanced settings window, click on "Inbound Rules"
5. Now click on "New Rules" from the action windows on the right side.
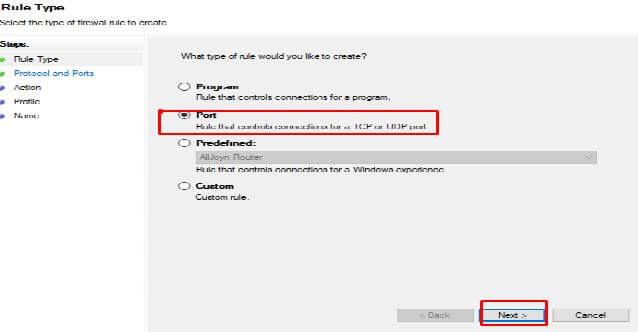
6. In New Rules wizard select the "Port" option and click Next.
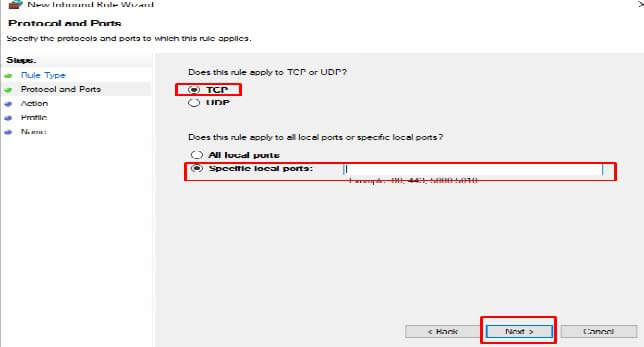
7. Select "TCP" or UDP, depending on the port you want to enable, and enter Specific local ports and click Next.
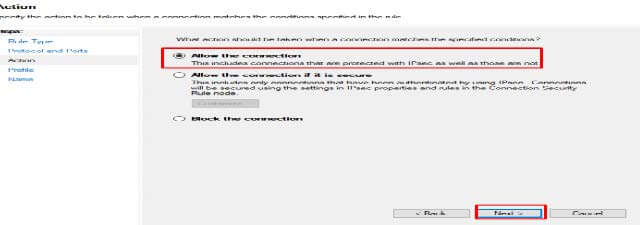
8. Select the "Allow the Connection" option and click next.
9. Choose the Network where you want to apply the rule (Domain, Private, Public) and click Next.

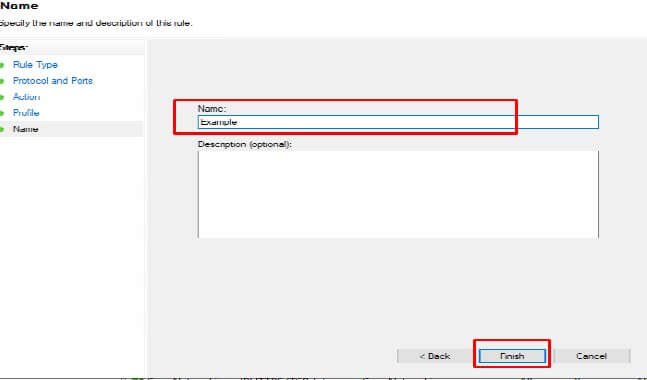
10. Enter the name of the rule and click Finish
Now, you can see the rule you created in the Inbound rules list and the specific port that has been enabled in the Windows firewall.
